Sitecore Personalisation FTFM - Sitecore Training

Transcript: How to set up Personalisation in Sitecore
In this video, we’re going to be talking about website personalisation within Sitecore.
We’ve written numerous blog posts on the importance of personalisation so feel free to head over to our blog and check them out if you’d like, but for those that aren’t too familiar with the concept of personalisation, essentially it’s an advanced marketing technique that allows you to deliver highly targeted content to each and every website visitor on an individual basis.
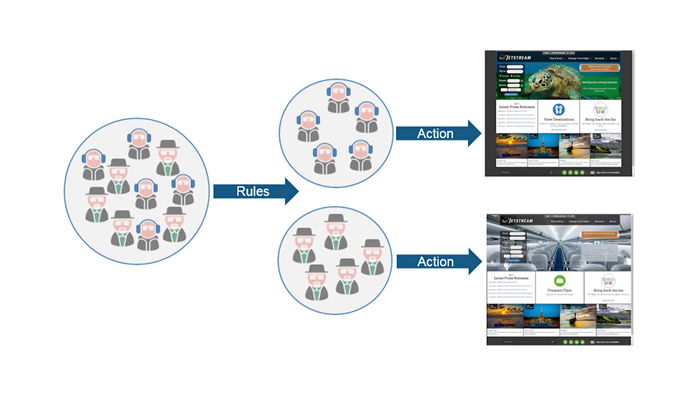
As an example, if we think the visitor appears to be a potential prospect based on their behaviour as they move through our site, we might display a banner that offers an irresistible discount which is strictly available for “new customers only”.

But if that visitor looks like an existing customer, we don’t want to risk upsetting them by showing the same irresistible offer if that offer isn’t actually available or applicable to them, so we could use personalisation to show them a different banner with an offer that is available and applicable to them – resulting in happy customers all around!
Now, this is just one good example of where personalisation can be useful, but realistically there are thousands of different ways personalisation could be used to your benefit...far too many to mention in this video! Just know that if you’re technically able to separate one particular type of visitor from another, whether that be through the pages that they’ve browsed, the forms they’ve completed, or maybe even their geographical location.Then you’re probably able to personalise their experience on your website in real-time.
OK, let’s dive straight in and take a look at how to add personalisation to a component within Sitecore…
So here we are in the Experience Editor of the 3chillies website and we’re on the about us page. I’ve chosen to personalise a component on this page because my analytical data suggests that this page has a good amount of highly engaged traffic passing through it before customers exit the site. So it seems to me that this is a perfect opportunity to seal the deal with any potential lead by providing a tasty looking Call to action for them.
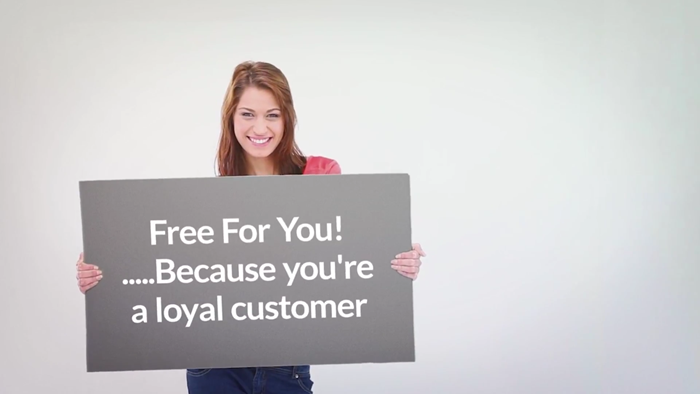
Now, with 3chillies being an Agency who develop and support Sitecore websites, we’re interested in promoting our Sitecore services to our website visitors. The problem is that we provide such a wide range of different Sitecore services, that it's hard to provide our customers with relevant targeted information on the service they are most interested in…that is unless we use personalisation!
So continuing with the same idea, we know that if a website visitor has been looking at pages on our website like the “What is Sitecore” page, we can be fairly confident that the visitor isn’t currently a Sitecore user, and that they’re probably interested in becoming one. So if they’ve visited that page, I’m going to show them this banner here, offering them the chance to take part in a free, no-obligation Demo of the Sitecore platform, so we have some text here with a button that takes them through to the relevant page for that. As a side note, I might spend more time making this component look a little prettier if I were using it in a real-world situation!

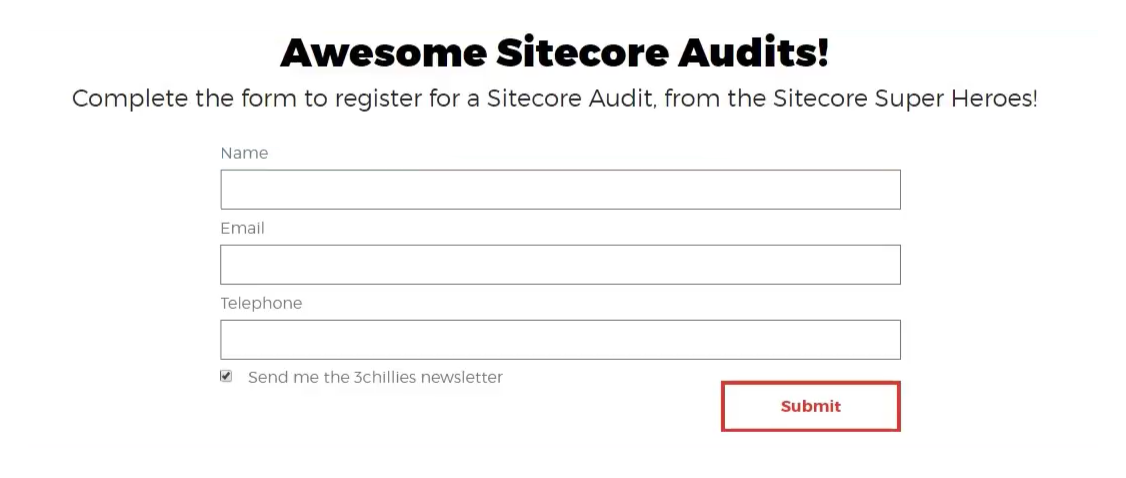
Now, on the other hand if the website visitor is looking at pages like our Sitecore Superheroes page where we offer Sitecore Audits, I can be pretty sure that they already have the Sitecore platform in place, so showing the same content offering a free Sitecore Demo will just be a complete waste of screen real estate because it’s not applicable to them. So In that case, we’ll show those visitors this form instead which enables them to quickly register their interest in receiving a Sitecore Audit!
And finally, if the visitor doesn’t meet either of these conditions, I don’t want this component to show anything at all.
So let’s create a personalization rule in the Experience Editor.
1. Click the View tab in the top ribbon, and in the Enable group, select Designing to enable the design functionality.
2. Then navigate to the component where you want to implement the personalization rule. I’ve made a new blank container .
3. Click the component, and in the floating toolbar that appears, click Personalize Component Icon.
4. In the Personalize the Component dialog box, click New Condition.
5. And Give the new condition an appropriate name…and for this example I’m going to call it “Sitecore Demo” and click ok, I’m going to add another one here real quick called “Sitecore Audit”.
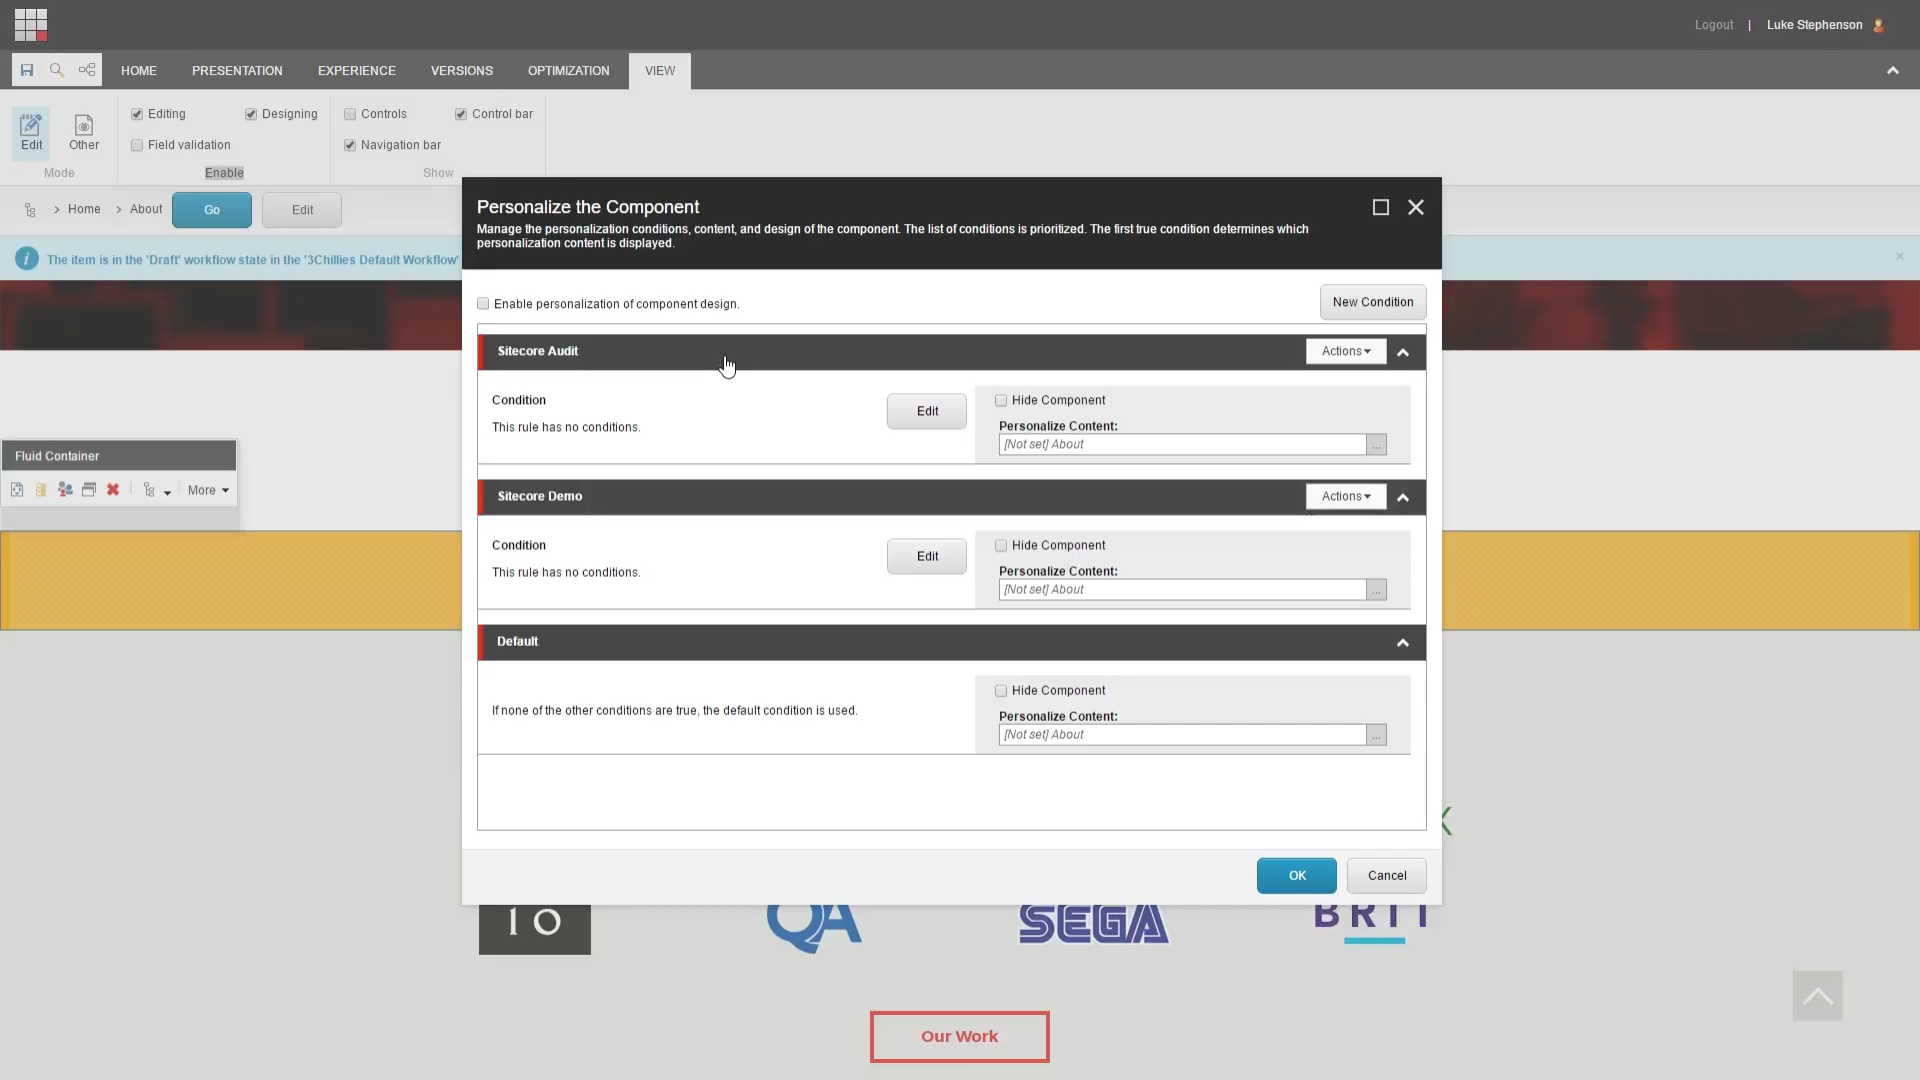
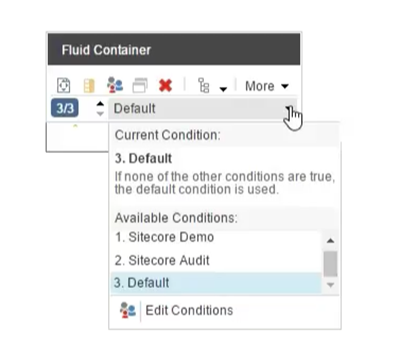
It’s important to note that Sitecore evaluates the personalization rules in the order that they appear in the Personalise the Component dialog box. So if the visitor doesn’t satisfy the rule specified in this condition up top, Sitecore moves on to the next condition, and so on, until the visitor meets one of the conditions. So if you have 2 rules that could potentially apply to one single visitor, the personalisation tool will always choose the option that is highest on this list. So with that in mind, you can use the in the top right corner to move the rules up or down in the stacking order.
You’ll also notice the block down the bottom, and this is the default condition that is used if a visitor meets none of the other conditions.
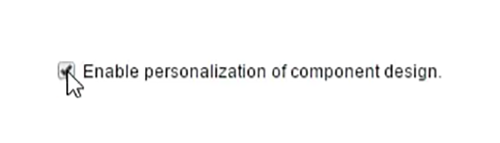
So if we go back to the rule we created for Sitecore audits, we can click in here to select the content that we want to display to that type of customer. But you’ll notice that we are pretty limited on options here…that’s because the item you choose here must be compatible with the current rendering item and Sitecore. For example, you must use web forms renderings if you want to show a web form item or a text rendering if you want to show content stored in a text field. If that sounds a bit confusing, don’t worry too much. I’ll show you what I mean in just a second. If we click cancel on that and then click this button up here called “Enable personalization of component design” you’ll notice that this box pops up here and that’s going to allow us to select a different kind of rendering for this component.
In this case, for the Sitecore Demo rule, the content we want to display lives inside of a text field, so we’ll choose text in here, and then we’ll tell Sitecore exactly which data-source text we’d like to use. And for this one, we want to display a form, so we’ ll select the form component here and click the personalise content box to select the relevant form that we want to show.
Ok great. We now have the components set up with the different content variations and all we need to do now is tell Sitecore exactly when it should display this particular component over the other options.
So, to define the condition for the new component, click Edit, and in the Rule Set Editor, in the "Select the condition for the rule" field, select a condition.
As you can see there are a tonne of different rules you can use, and if you can’t find one that you need your Sitecore agency should be able to code in new rules for you as well.
6. In this simple example, in the Filter field, you enter the search word “visit” and select the option “where the specific page has been visited during the current visit .”

So just like it says on the tin, That rule will allow us to create a personalisation rule that only applies to website visitors who have already visited certain pages within our website.
7. To edit the values in the condition. click on the links in the Rule Description field….
a. The first link contains the words where. If you click the link, Sitecore reverses the condition, alternating between where and except where.
b. The second link contains the word specific and if we click that we can go ahead and select the page that we want the website visitor to have passed through before this personalisation rule is triggered.
c. Other personalisation rules might include different links here, but they’ll be the same in the respect that you just need to click on them to be taken through to the relevant dialog box.
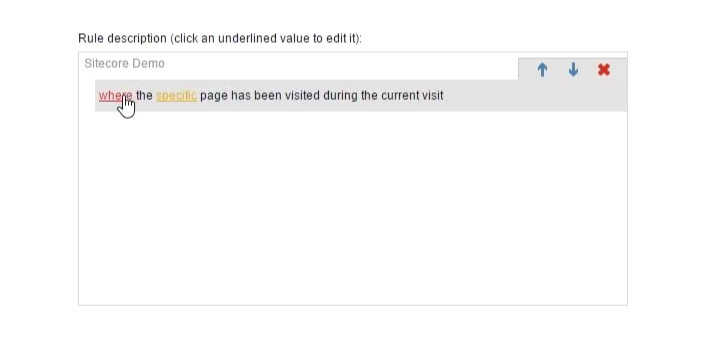
When we’re done here, we’ll click OK. And while were in here let me quickly go ahead and complete the other banner using exactly the same method only this time I'll select a different page here….ok done.
Ok so now we have two conditions here. Were telling sitecore. Go check if the visitor has visited the What is Sitecore page during their visit, and if they have, show them a text field with this content inside of it.
If that doesn’t apply to them, check to see if they’ve visited the Sitecore Audit page, and if they have, render a form inside of this component, and use this form here.
And we said that if all else fails, just don’t show anything at all, so for the default condition I'mm just going to hide the component altogether.
When you have finished selecting the content for personalization, click OK.
OK, so now we are all set up with personalisation, and we’re almost ready to push our changes to the live site. Before we do that, we’ll just want to check that our personalisation efforts are going to work the way we expect them to, so let’s look at how to preview them quickly.
In the Experience Editor, click the component that you added personalization to. In the floating menu that appears, click the arrow here and that’ll show you what the page will look like for the current condition. You can then click the other conditions down here to view the other personalised content that you’ve set up for the component.
OK, that’s it we’re all done for this tutorial, but in truth we’ve really only scratched the surface of what is possible with website personalisation. Try to have a think about how you might use Personalisation on your site. Start small, focus primarily on the quick wins because like anything, 20% of your personalisation efforts are likely to result in 80% of the total gains you see from personalisation. Best of luck and thanks for watching.
