Sitecore Training - Media Items (FTFM)

Transcript:
In the last video, we introduced you to the media library. In this tutorial, we’re going to be walking through the process of uploading, inserting and editing media files.
Upload a file to the Media Library
So here we are in the media library. Let’s start by navigating to the folder we want to upload media files to over in our content tree.
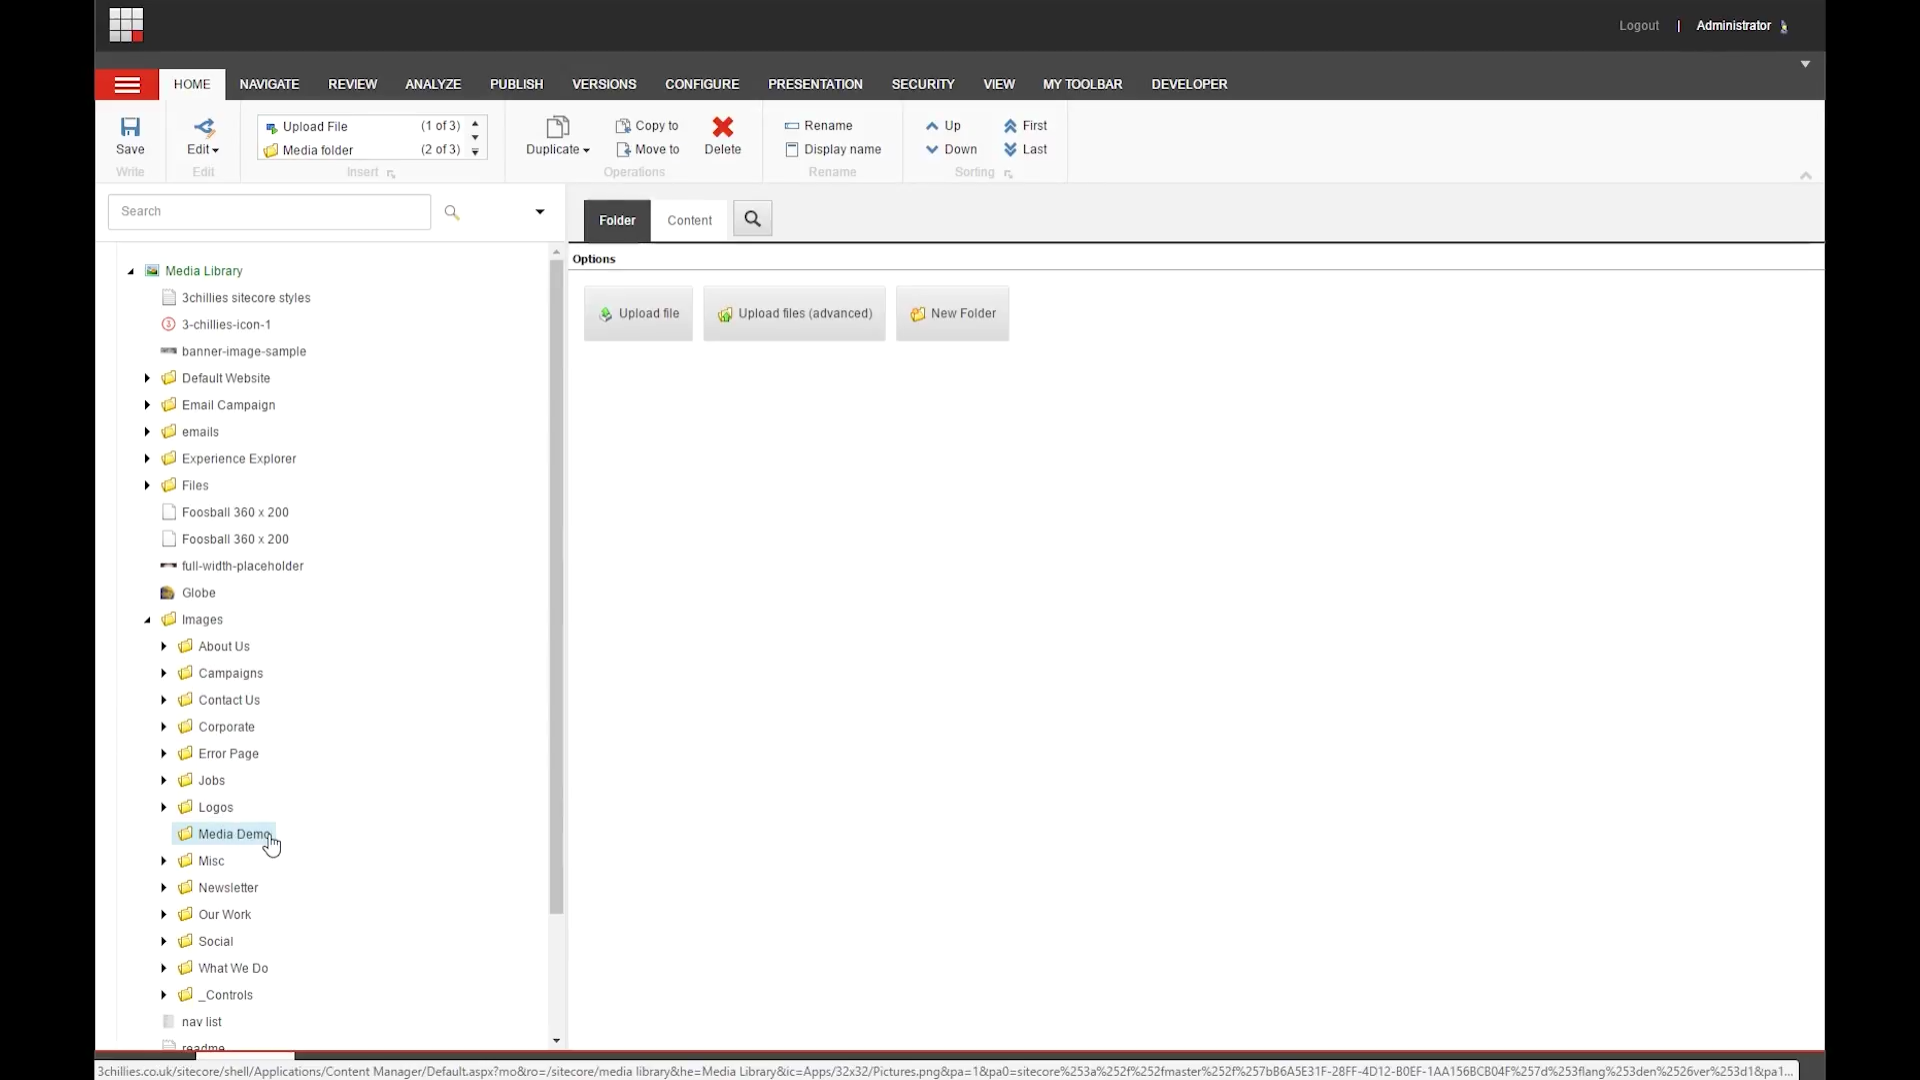
Make sure you’ve clicked on the “folder” tab up the top, and when that tab is selected, we get these options right here, to upload files into the folder we’ve selected in the content tree. If you click the fist button option "Upload File", you’ll get a dialog box which allows you to find the file that you want to upload, so let’s go ahead and do that, click open, and then click upload to go ahead and upload the file.
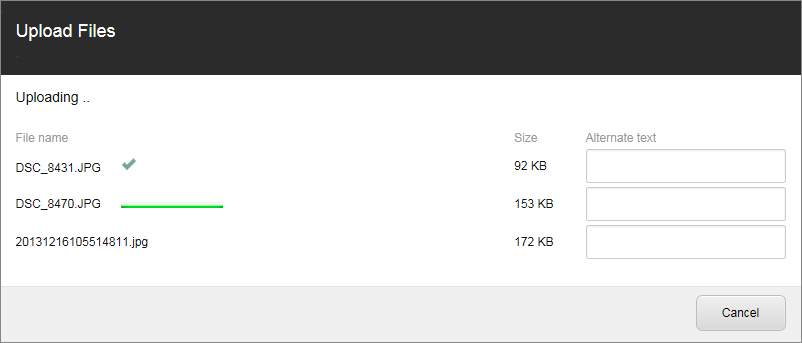
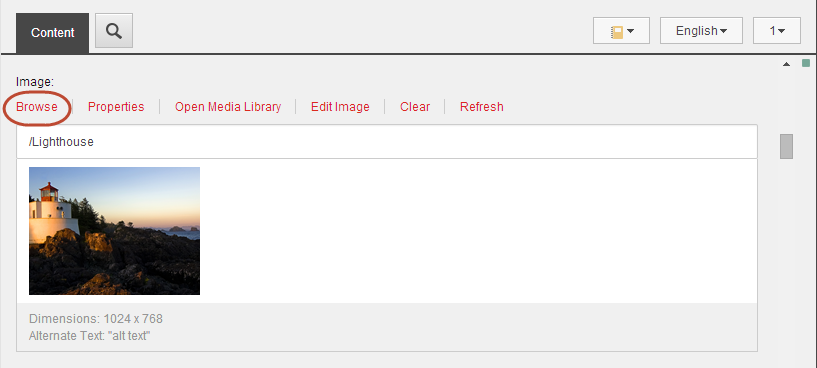
Whether you’re uploading one media file, or multiple, it’s always a good idea to give your images alternative text – it’ll help with various things such as SEO and site usability/accessibility, and actually if you don’t add alt text here, Sitecore will flag it as a warning which is indicated here.
You can get rid of that warning by adding some text into the Alt Text field retrospectively.
Right, now we’re going to look at some of the slightly juicier functionality available to us when we’re uploading files, and that’s found in this second button option called "Upload Files (advanced)". So let’s click into that and see what we get.

The view in this dialog windows is pretty much exactly the same as the previous option, except this time we have these options at the bottom.
Advanced Upload Options
With the Unpack ZIP archives option we can actually upload and extract a Zip archive straight into the Media Library. Perhaps most interestingly, you can include multiple sub-folders with files inside of them, and when you upload the zip file, Sitecore will recreate that folder structure inside of the media library which is an awesome time-saver if you’ve got a load of campaign assets that you’re trying to upload all at once for example.
Just by way of demonstration let me quickly show you what I mean. Let’s cancel this, and head out to the documents stored on my computer here for a second. Here we have a folder with an image inside of it and a sub-folder. If we click into the that sub-folder we’ll find another image and yet another sub-folder, and if we do it again you’ll find another image in there along with a nice subliminal message, little plug for 3chillies there.
So let’s go out the parent folder, and zip that folder up, so that we can upload it to Sitecore. And we’re going to head back over to Sitecore, upload that using the advanced file uploader, and we’ll click upload, and when we’re done you can see that Sitecore has imported the folder structure, along with each of those images into the media library.
OK, Let’s head back into the advanced uploader, and the second option here is “make uploaded media items versionable”. So when you select this option, you’ll be telling Sitecore to create the media file
in the selected language only, and any other language version that you want, you can create that manually so that’s a really handy option for multilingual sites.
The next option here “Overwrite existing media items” is really handy for speeding things up whilst also making sure you don’t end up with duplicate files. Essentially, you can select this option if you want to overwrite a file that already exists in the Media library which again is a really neat little time saver if you just needed to make a quick tweak to the item via an application on your local machine. It’s really important to understand that if you want to use this item, you need to make sure that the new file has the same name as the existing file that you’re planning to overwrite.
Drag & Drop
If you work in Internet Explorer 7 or later, the drag-and-drop option is the quickest and easiest way to upload media files to the Media Library. You can upload single or multiple files from your computer to the Drag & Drop dialog box and this is especially useful when you want to upload multiple files to different locations in Sitecore from different locations on your computer. But as I say, it is only available in internet explorer at the moment so if you use chrome Firefox or any other browser, this option will not be visible.
To use the drag and drop functionality:
1. Click the Drag & Drop button.
2. Open Windows Explorer and navigate to the folder where the images are stored and select the images you want to upload.
3. Position Windows Explorer next to the Drag & Drop dialog box and drag the selected images across.
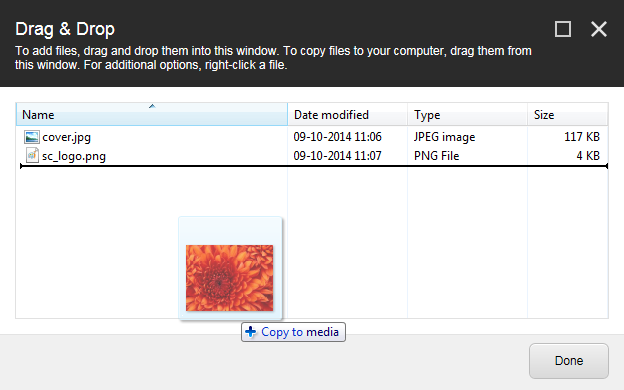
4. When you’ve dragged and dropped all the media files you wanted to transfer, you can click Done, and that will copy them into the Media Library.
Note: If the folder you copy to already contains a media item with the same name, the Copy File dialog box opens, asking you to decide how to handle the duplicate media items.
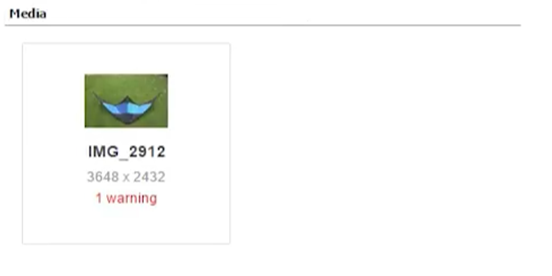
In the editing pane, on the Folder tab and in the Media section, you can now see the images that you uploaded and that each new item contains a warning.
5. To remove these warnings, open each media item and enter the alternate text in the Alt field.
Inserting an image
OK so now that the media item is in our media library, let’s look at how to place it onto a page. There are a number of ways to do that.
If we are in the content editor and we come across an image field like this one here, we can click browse here to find the image from our media library.
If you’re in the experience editor, you can click the image field where you want to insert an image and in the floating toolbar that appears, click this icon here to Choose an Image.
1. The Select Media dialog box will appear, and display all the items from the Media Library that are available for the image field you have chosen.
It’s important to realise that the items in this “Select Media” dialog box aren’t listed in any particular order, so you can use this box here where you can search by various different attributes, you could use the predefined search filters over to the side, or you can simply use the search bar up here to look for the image that you need.
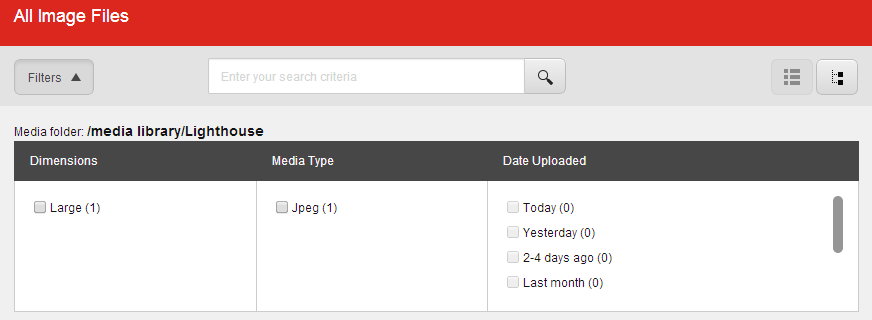
If you'd like to navigate through the content tree to find the image that you want to use, you can click the icon in the top right corner which is the Tree View icon. And once you’re done with that, you can click the button beside it to go back to the list view .
2. So once you’ve found the image that you want to use, highlight it by clicking on it, click Select Media, and the new image is inserted into the image field.
Before I do that, it’s also worth noting that you can also upload new images from this view.
Insert an image into a text field
Now, if you’re looking to insert a media item into a rich text field you’ll see an option which is the Insert Sitecore Media icon (the one that looks like a picture in a frame), and once again go ahead and find your media item from there.
Edit a media item from the Media Library
Alright, now we’re going to look at how to edit a media item from the Media Library:
1. In the Media Library, navigate to the item that you want to edit and select it
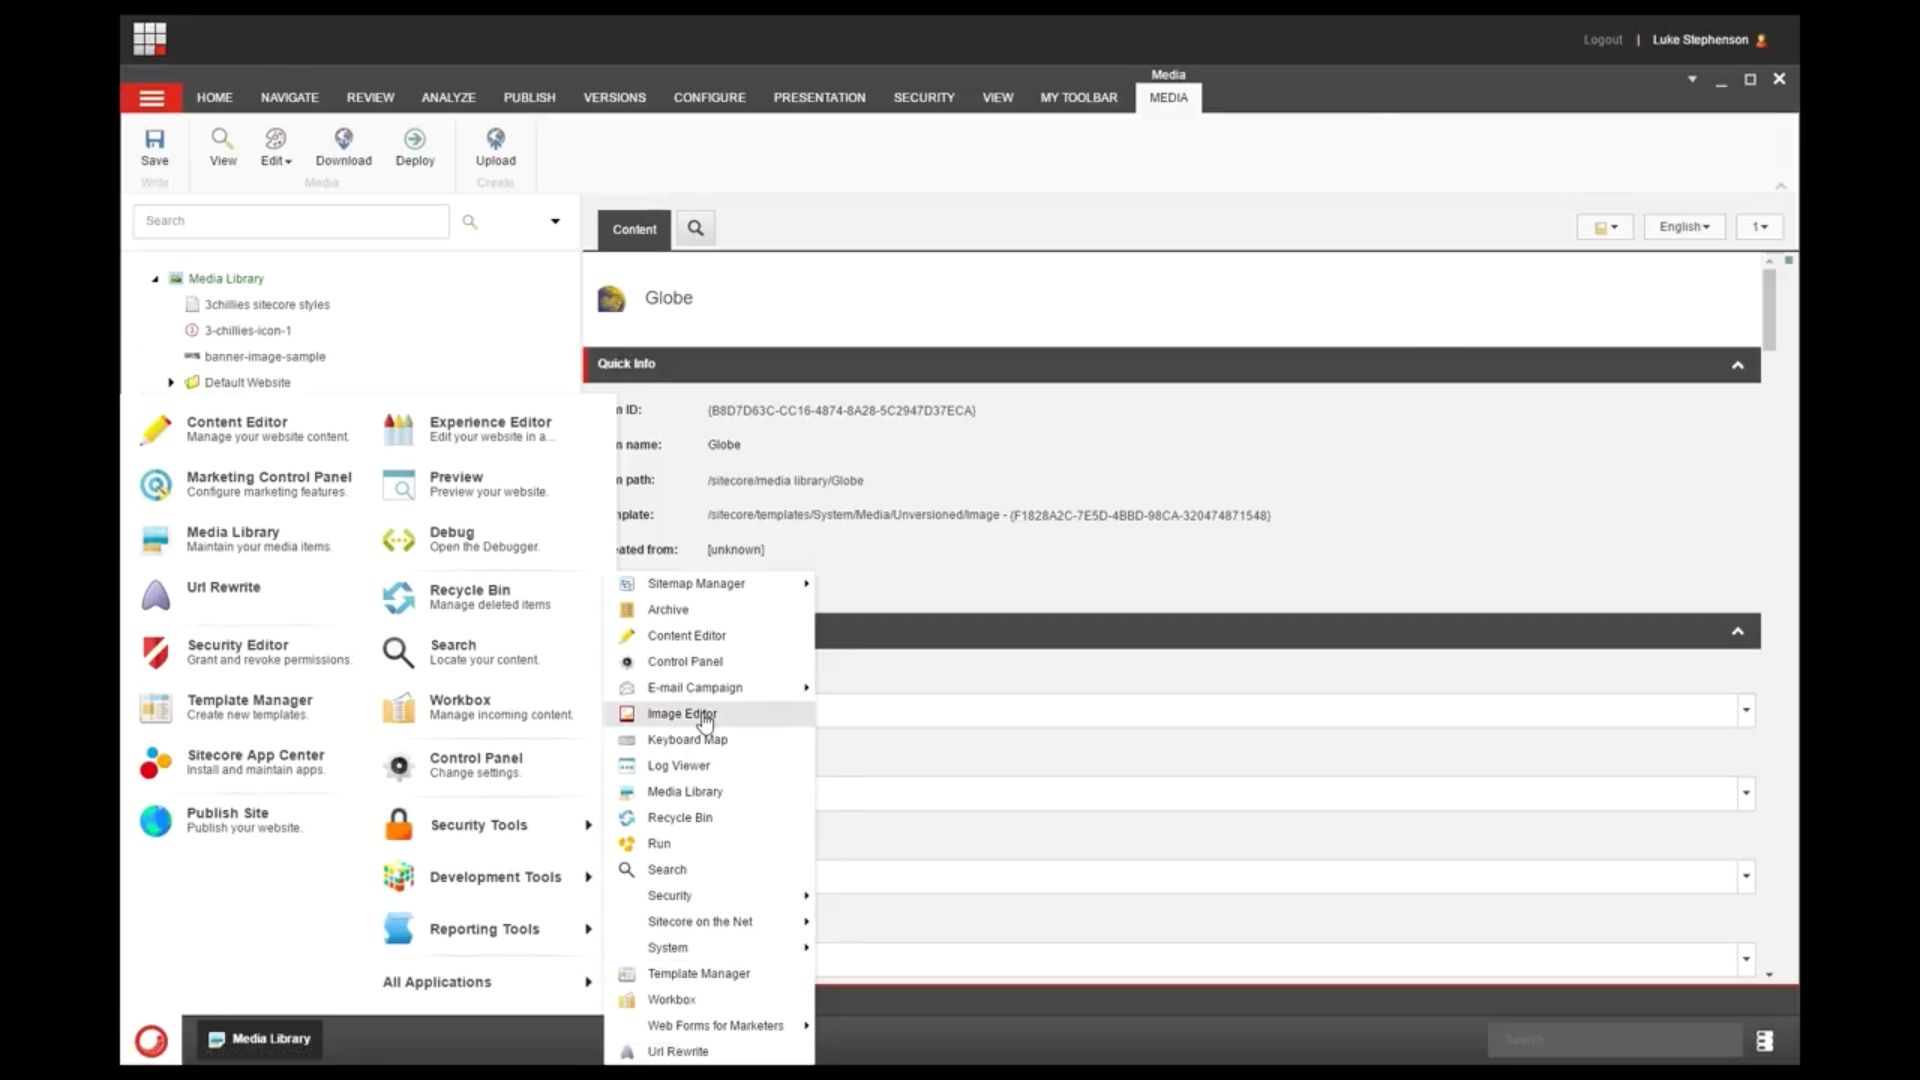
2. And On the Media tab, in the Media group up here, you can click Edit. Now it’s important to realise that this icon changes depending on the type of media item selected. For example:
- If the media item is a Word document, you would see a pencil as the associated icon, and that would open the item in Microsoft Word.
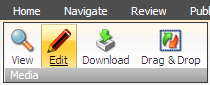
- Or if the media item is an image, you would see an artist’s palette and by default This icon would open the image in the Sitecore Image Editor.
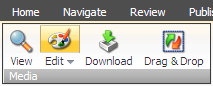
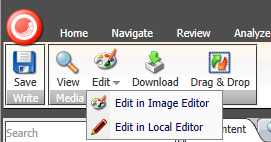
3. For images, you can choose which application you want to use in order to edit the image. So if you click this dropdown here under the edit button, you might actually have two options which would be:
- Edit in Image Editor, which is the built in editing functionality within Sitecore, or
- Edit in Local Editor, which would allow you to open the image in an application that you have on your PC, like Photoshop
Change the default image editor [Revised: Section added]
When you edit an image, you can change the default image editor to one on your local machine, and in this way, when you click the Edit button, the image will open up in your local editor like adobe Photoshop instead of the Image Editor within Sitecore.
To change you default image editor:
1. In the Media Library, click the System menu and then click Application Options.
2. In the Application Options dialog box, click the Media tab.
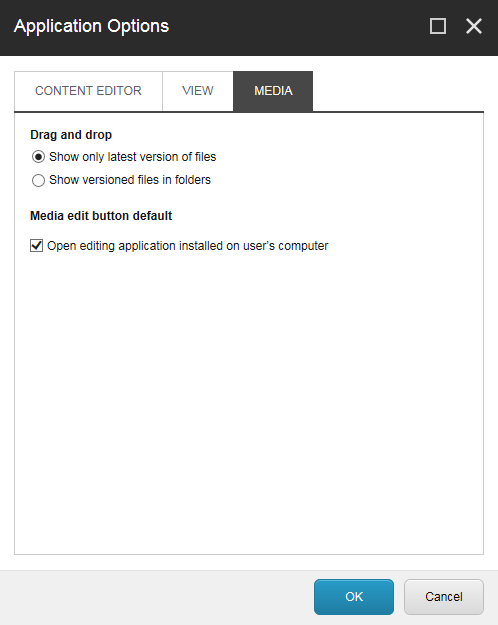
3. In this section here, select the Open editing application installed on user’s computer check box and click OK.
Open and edit an image from the Image Editor
Let’s take a look at the Sitecore image editor and see what functionality we have there.
But this time we’re going to access the image editor via the Sitecore desktop. So we can do that by clicking the Sitecore Start menu.
1. Click All Applications
2. and then click Image Editor.
3. In the Image Editor, in the ribbon, click Open.
4. In the Select Media dialog box, select the image that you want to edit and click the Select button.
5. Within the editor we have the option to crop, resize, flip the image vertically or horizontally or rotate the image 90 degrees left or right, so you can see that, whilst this tool is fairly basic, it can save you a fair amount of time if all you want to do is perform a fairly basic edit.
When you’ve finished editing your media item, you can save your changes and close the editor.
Edit an image in an image field
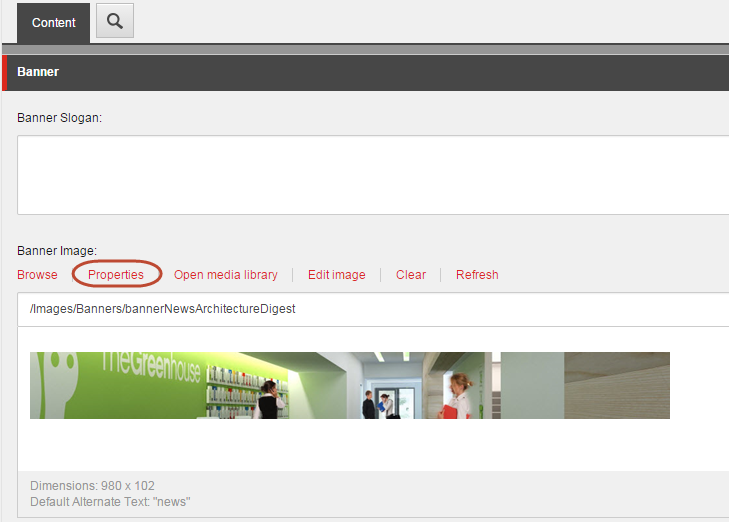
To edit the properties of any particular image, navigate to the item or page that you want to edit, and in the Content Editor, on the Content tab, scroll to the field that contains the image and click Properties.
Note that you can also get to the properties box by clicking on the Modify Image Appearance icon which appear in the floating menu within the experience editor.
2. In the Image Properties dialog box you can add Alt Text
- Change the dimensions of the image
- Or add space around the image.
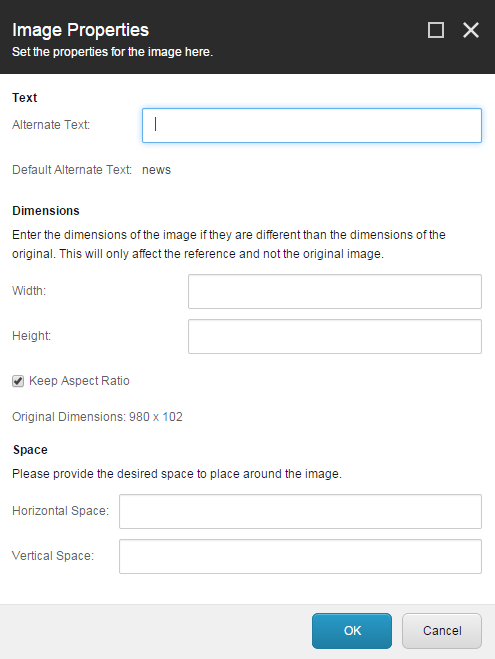
3. Now, it’s important to realise that when you do this, you are only changing the image on this particular page. Remember, this item actually lives in the Media library and it might be being used in multiple locations on your site. So for this particular page you might want to use a much smaller instance of that picture and that’s fine, we can come into here make the changes to the dimensions and click ok, and that will only affect the image found here on this page, because we are editing the reference, and not the original image. To edit the image itself, you got to open the image in the Image Editor or make the changes on your local machine and re-upload the image to the media item in the media library.
That’s it for this tutorial, I hope it was helpful! Be sure to check out our other Sitecore Training videos
