Creating an email campaign in Sitecore

Quick Links:
This tutorial is Part 3 of a mini-series on Sitecore's EXM functionality.
EXM Part 1 - Intro to Sitecore EXM (FTFM)
EXM Part 2 - Creating Contact Lists in Sitecore
Transcript:
Sitecore's Email Experience Manager (EXM), guides you through the process of creating and sending your email campaigns pretty well, but it's handy to know that you don’t have to follow the forced process from start to finish. For example, when you’ve created an email campaign, you can easily edit the content and add recipients at a later stage.
In this tutorial, we are going to be covering the process of selecting your message template and adding lists of contacts to include and exclude from receiving the email.
Now, in EXM, you can create different kinds of emails. You’ve got the options of :

• One-time messages – which is an email campaign
• Subscription message – which you can use to create a message from an existing message, so if you made a newsletter last month and you’re ready to send out the next newsletter, this will be the option you want to choose.
• Triggered messages– which is an email campaign that is triggered by an event or goal that you’ve set, so you can use this type of message as part of an engagement plan.
To create a new email campaign:
1. In EXM, on the dashboard, click Create and in the menu that appears, in the Create email campaign section, select the type that you want to create
2. In the dialog box that appears, click the template that you want to base your email campaign on and enter the name of your email campaign in the Name field.
By default, EXM contains a number of predefined templates and import options:
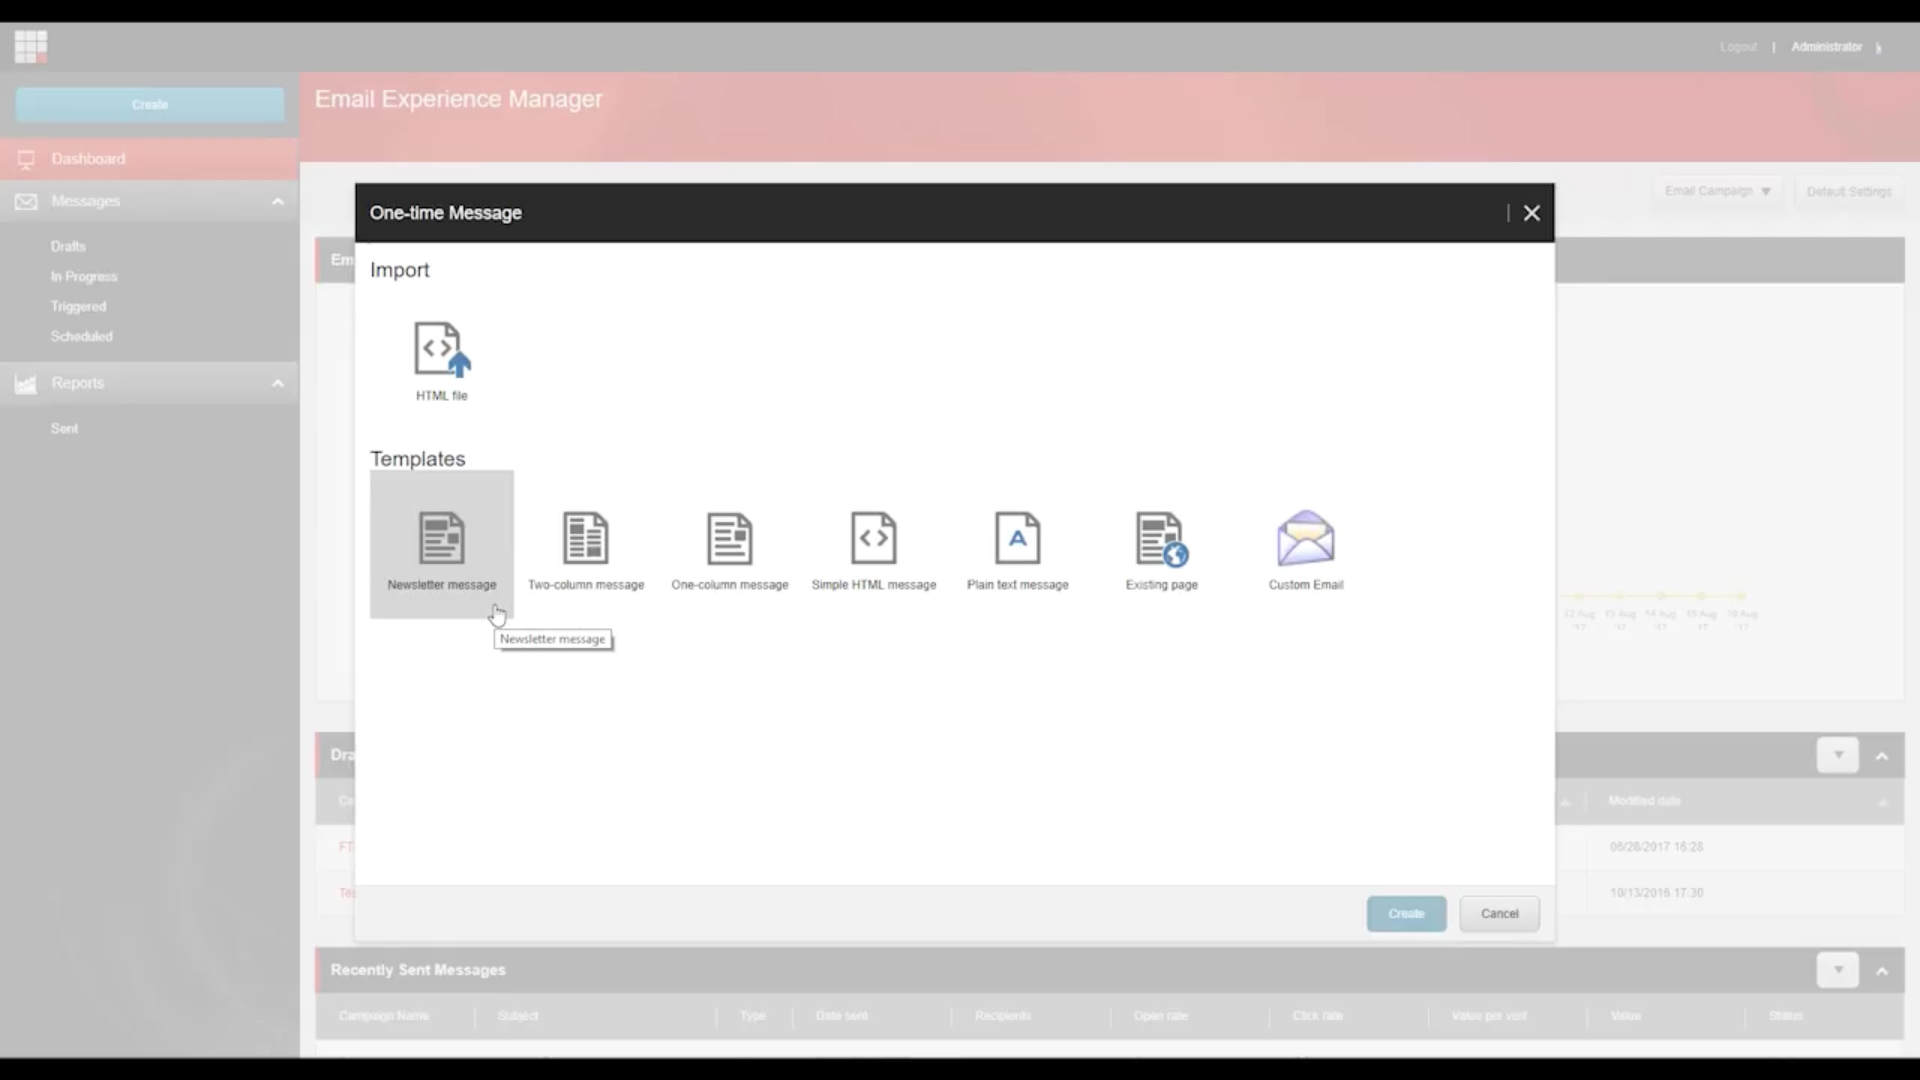
HTML file - This is an email campaign based on imported HTML code for the message body. And for this, you can import any HTML file.
Newsletter -This is a template with a link to the online version of the email campaign.It has a header and a footer along with links that go through to an opt-out page.
Two-column- This is a template with a two-column layout. It has a footer with links to opt-out pages.
One-column - Just like the two column layout, this is a template with a one-column layout and a footer with links to opt-out pages.
Simple HTML - This is an HTML template without a predefined layout.
Plain text - Which is a plain text template without a predefined layout.
Existing page - This is a template based on a Sitecore web page. It allows you to select a page on your Sitecore website and use it as the message body. Now, as you'll know, some pages in Sitecore can be quite complex, and security restrictions may apply to certain elements on the page. For example, a page may contain a section that only registered users can see if they open this page on the website. Well, EXM enables you to define how email campaigns are created from web pages. And There are two options:
The first option is to have EXM respect the security settings. In this case, recipients with different security privileges will receive different email campaigns (if the source page has security restrictions).
The second one is for EXM to ignore all security settings. In which case, EXM goes ahead and renders all elements on the page and all recipients receive exactly the same email campaign, so it's worth knowing about those security settings.
Once you’ve selected the preferred template type, the new email campaign opens.
On the General tab, in the General Information section and in the Sender details section, edit the relevant fields. So I'm going to add a description to help remind me of what this campaign is if I ever need to look back at it.
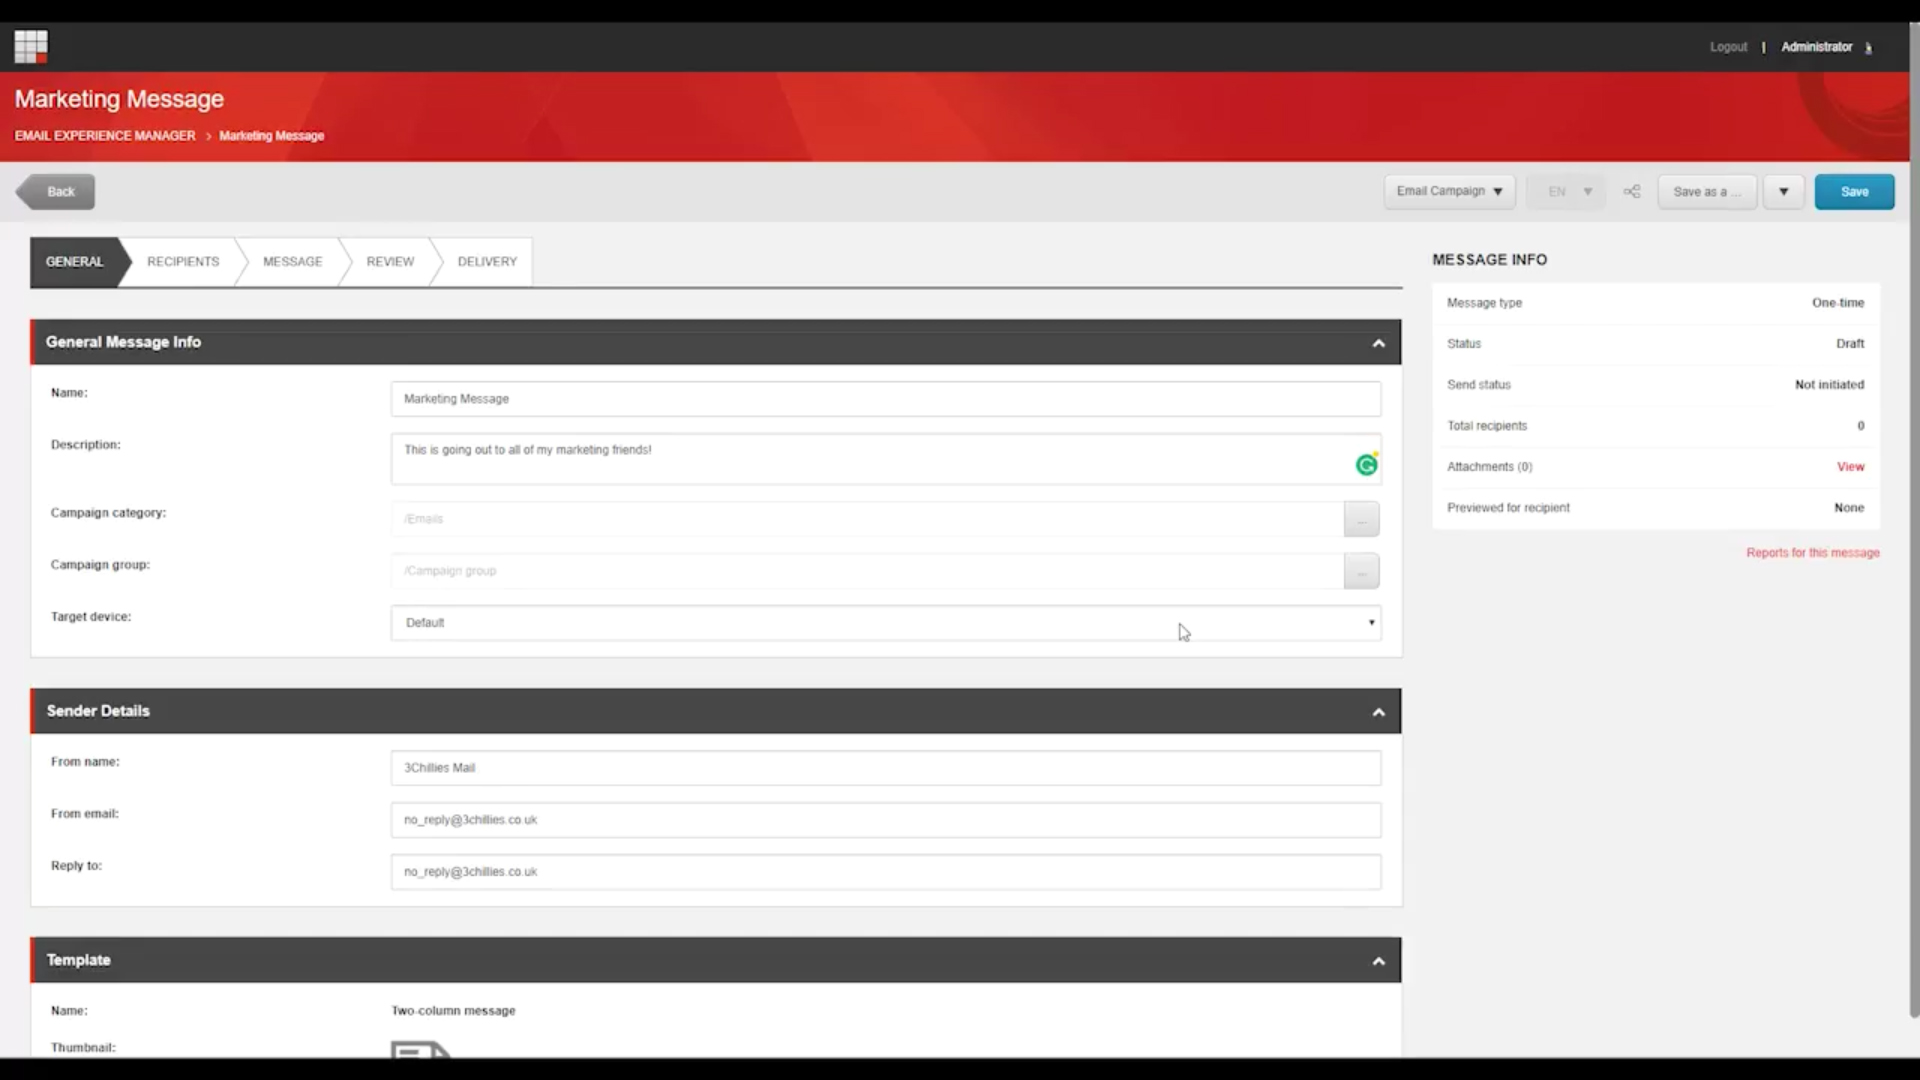
I’d also change the Campaign Category of the email campaign, in this field here (to Specify a more suitable location for this campaign).
To associate the email campaign with an actual Sitecore campaign, in the Campaign group field, you would click the browse button, and in the Select campaign group dialog box that appears, navigate to the relevant campaign and click OK. We will cover campaigns in a future video so if you’re not quite sure how they work just yet, don’t worry, you can just leave it for now - there's no Sitecore campaign associated with your email campaign by default.
Make sure you’re happy with the fields down below regarding your sender details, and if you are, go ahead and click save and then click on the next tab up in this process flow labelled “recipients”, which is where we’ll select who we want to send the message to.
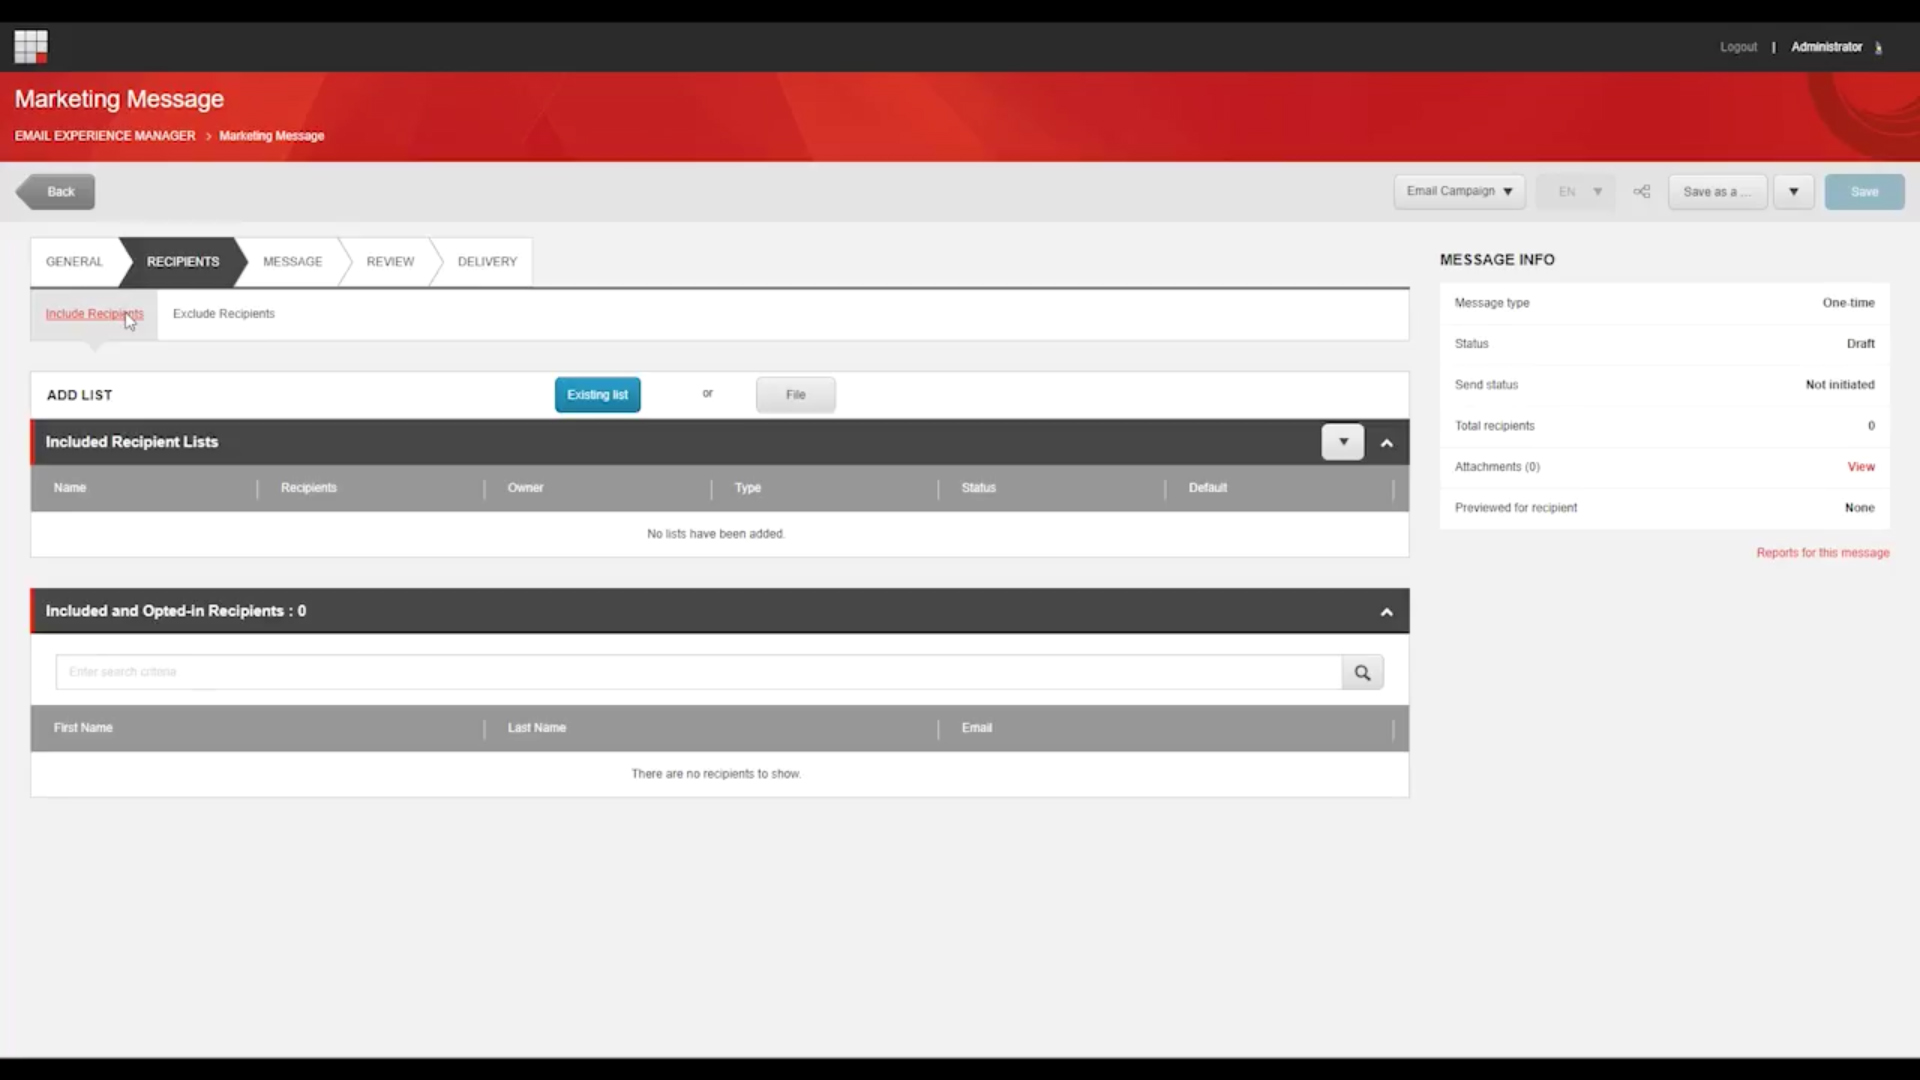
When you create an email campaign, you must include at least one recipient list for the message before you can send it. The tabs up here contain:
• Included recipient lists – which are all the recipients that you want to send the email campaign to and at least one of the included lists must contain at least one recipient.
• Excluded recipient lists – which are all the recipients that should not receive your email campaign.
You can include as many lists as you want. And don’t worry, if the same recipient appears multiple times in the included lists, EXM makes sure that the recipient only receives your email campaign once (so long as the contact has the same identifier which is usually their email address – the only reason this might be different is if you chose to change your identifier when creating your list, but if you followed my video on creating recipient lists to a Tee, then you won’t have changed the identifier).
It’s important to understand that a contact can only subscribe to an email campaign if a contact list is included in the email campaign. Contacts cannot subscribe to a segmented list because a segmented list is generated in real-time according to the defined rules.
When a contact subscribes to an email campaign, they are added to the first contact list that is included in the email campaign.
When a contact unsubscribes from an email campaign, they are removed from all the included lists for this email campaign. If the unsubscribe is not successful or if the contact is a member of an included segmented list, the contact is added to the global opt-out list instead. This ensures that the contact does not receive any more email messages.
To include or exclude an existing list, in the Include lists section or in the Exclude lists section, click the tabs up top to select the relevant lists. We’ll choose one we made earlier, along with another one that was made a little while ago because I think the campaign is highly relevant to those people too. I don’t want to exclude anyone from this email, so I’m going to go ahead and leave the exclude list blank, but if I did want to exclude certain people contained within other lists, I’d add those lists here, using exactly the same process.
Alright, that’s it for this tutorial. In the next one, we’ll be continuing on with this campaign creation process by creating the actual message that we’re going to be sending out.
