Creating Contact Lists in Sitecore

Transcript:
In this tutorial, we’re going to be showing you how to build lists in Sitecore’s Email Experience Manager, otherwise known as EXM.
In the last video, we took a quick look at the process of creating and sending emails in EXM. In that tutorial, I told you that I prefer to create my recipients list, the list of email addresses that will receive my email campaign, before I even begin to create my actual email campaign, so that’s exactly what we are going to be doing in this tutorial.
So, you can create lists of your recipients from either the Email Experience Manager or in a tool called the List Manager, and, when you create lists in the Email Experience Manager, you’re really just using the List Manager functionality. So in that way, it doesn’t matter where you create your contacts lists, because they’re stored in the same place, and all lists are available from either application.
To create a list in EXM:
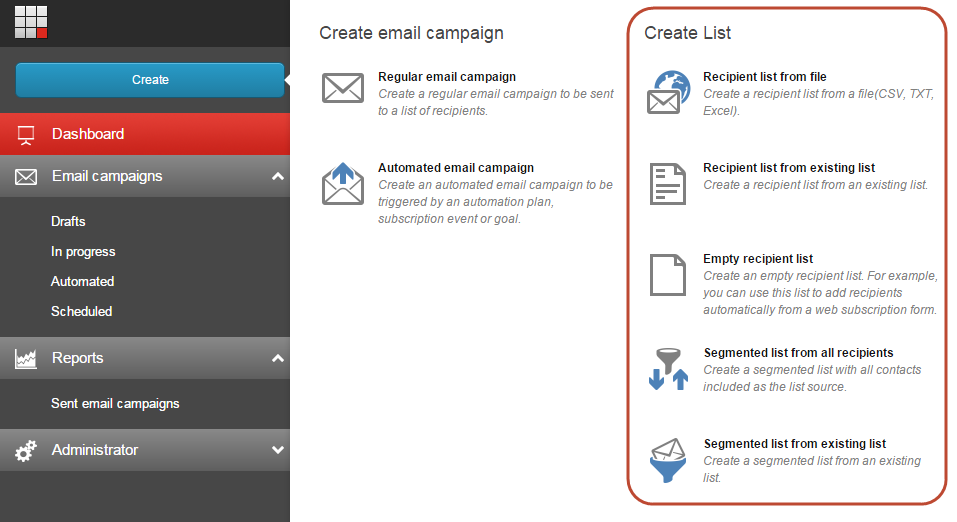
On the EXM dashboard, click Create, and then in the menu that appears, in the Create lists section, click the type of list that you want to create, They all pretty much do what they say on the tin, but let’s quickly take a look at the different options here:

Choose "Recipient list from file" – If you want to create a contact list and import the recipients from a CSV, .txt or Excel file. So this option is massively helpful in situations where you want to transfer contacts into Sitecore from a third-party system you’re your CRM system, or you might happen to have an excel spreadsheet full of leads. You can import these contacts from a CSV file directly into a list in the List Manager.
If you choose this option, you’ll be thrown through to the Import contacts dialogue box, where you can upload your file, and go through the quick process of mapping the header cells from your spreadsheet into Sitecore. Just a quick note on that, you’ll want to make your spreadsheet look something like this:

It’s important to know that Sitecore won’t use this top row as data, it’ll want to use it for the mapping process. It’s also important to note that, as a minimum, you’ll need separate columns for first name, last name and email address since all of those fields are required.
And when you click through to the next page, you’ll be able to see the results of your upload, and if you missed any of the required information off, Sitecore won't import those contacts, so make sure your data is clean and complete before you start.
Let's head back to the other options we were faced with and briefly run through the capability of each of them….
- Choose "Recipient list from existing list" to create a contact list that is based on an existing contact list that you’ve set up in Sitecore.
- Select "Empty recipient list" if you’d like to create an empty contact list that you can work with. You might use this if you’ve created a new signup form on your website, and you want to automatically add the customers that use that form, into a blank list.
- Pick "Segmented list from all recipients" If you want to create a new segmented list using all of your current contacts that you have in Sitecore as your list source. And finally…
- Choose "Segmented list from existing list" If you want to create a segmented list that is based on an existing contact list that you’ve already built here, in Sitecore.
Ok, so now you know how to create a list of recipients for use in EXM.
Now we can begin to create our email campaign. And that’s exactly what we are going to be doing in the next video.